
1. Sculpting Torso
Step 1
Start Z Brush and open the file which was saved in the last part of the tutorial. The head part was created, now I'll show you how to sculpt the torso.
Go to Geometry > Insert >Cube3D and create a cube.


Step 2
Scale andplace the cube to the approximate position. Press X to mirror the followingactions.


Step 3
PressShift key to smooth the edges of the cube.


Step 4
UsingMove brush (B-M-V), sculpt out the basic shape of upper body.


Step 5
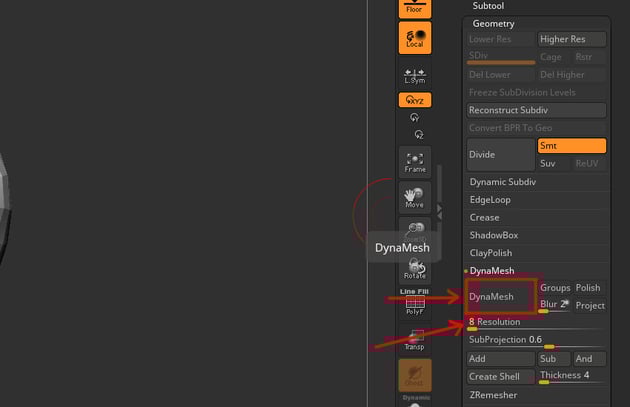
Underthe Geometry > DynaMesh, reduce the Resolution to 8, then click DynaMesh tofix the uneven topology.

Step 6
Insert aSphere from Geometry > Insert, place and scale as hips.


Step 7
Byusing Move brush (B-M-V), sculpt the basic shape of the hips.


Step 8
Mergeboth upper body and hips together from Geometry > Merge > Merge Down.


Step 9
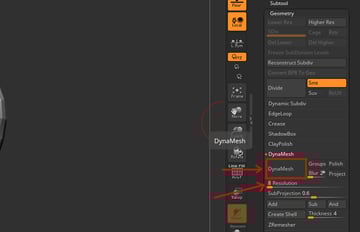
ClickDynaMesh. Go to Geometry > Dynamesh > Resolution: 16.
Dynamesh not only fixes uneven topology,but also merges two separated objects’ topology into one individual object.


Step 10
HoldShift and smooth the surface. Subdivide the mesh by pressing Ctrl-D twice.


Step 11
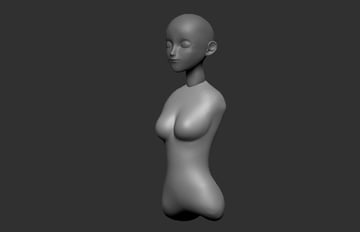
Sculptout the breasts using ClayBuildUp brush (B-C-B), then smooth the surface.


Step 12
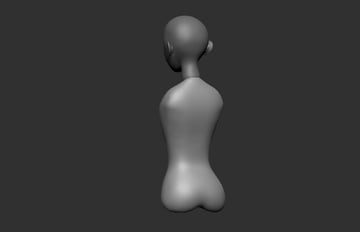
Continuewith ClayBuildUp brush, sculpt out the scapula from the back.


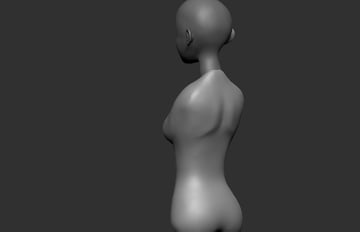
Step 13
Forthe hips, use DamStandard brush (B-D-S) to get the shapes.


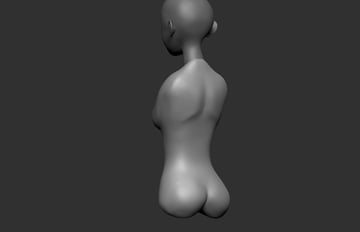
Step 14
Sincethe torso mesh was build up by two meshes before. When you press Shift-F toshow the wireframe, you'll find that the mesh has two different colours, and you have to fix this before exporting to Maya.
On the right side, expandPolygroups, click Autogroup.


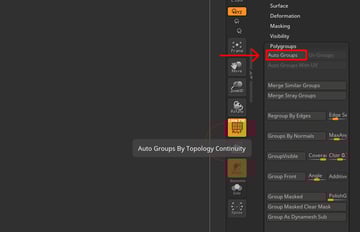
Step 15
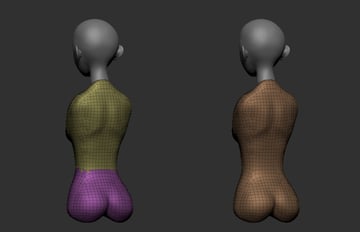
Nowit should look like the right side as shown in the following image. This step is to prevent the mesh separatedwhen you export to Maya.


2. Sculpting Legs
Step 1
Go to Geometry > Insert and insert a cylinder. Scale and place the cylinder on the leg’s position.Rotate a little bit outwards.


Step 2
PressDynamesh with Resolution as 16, then hold Shift button to smooth the surface.


Step 3
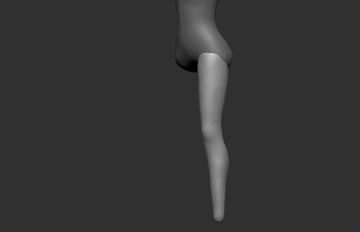
Press Ctrl-D to subdividethe mesh. Using Move brush (B-M-V), pull out the basic shape of leg.


Step 4
Duplicate and mirror for the right leg. Then merge them together.


Step 5
Go to Geometry > Insert > Cube and insert a cube for foot. Place andscale the cube to the foot’s position.


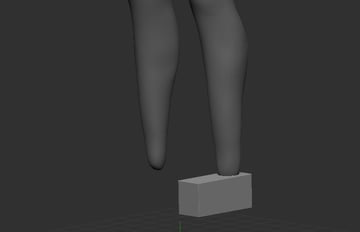
Step 6
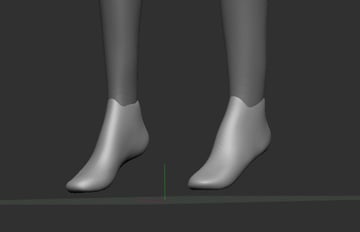
Sincethe character will be wearing high heels, so the foot needs to be stand ontiptoe, but you don’t need to sculpt the toes since they will be covered by theheels.
Rotate a little on x-axis.


Step 7
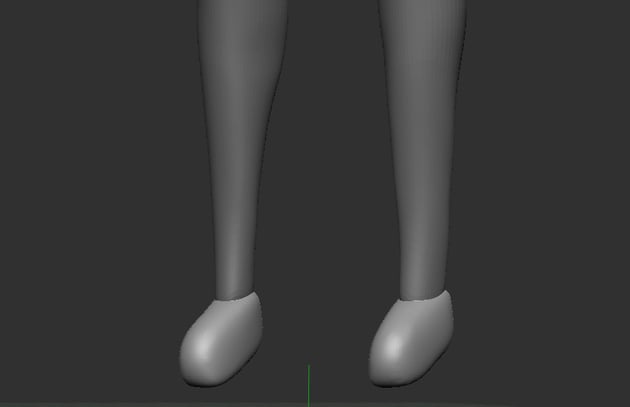
HoldShift button to smooth the edges.
If the leg mesh is not attached together withfoot, you can either move up the foot mesh (W-E-R), or extend the leg mesh withMove brush (B-M-V). Here, I used the second way of doing so.


Step 8
Go to Geometry and click on Dynamesh to fix uneven topology.


Step 9
Duplicateand mirror to the right, then merge together. Press X to mirror your followingactions.


Step 10
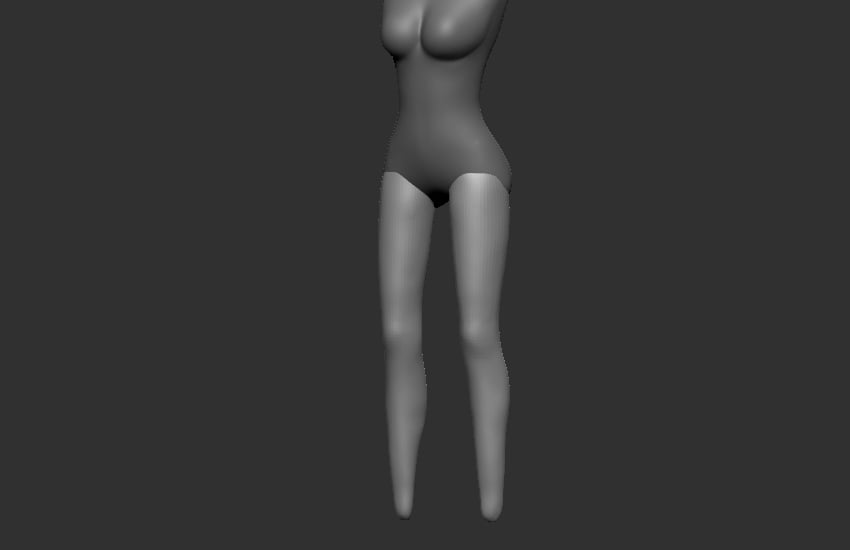
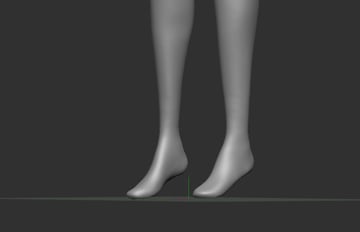
UsingMove brush (B-M-V) to shape the feet.


Step 11
Merge legmesh and feet mesh together. Then click DynaMesh to join the wireframe into onemesh.


Step 12
HoldShift button to smooth the surface. Use Move brush (B-M-V) or ClayBuildUp brush(B-C-B) to shape it if needed.


3. Sculpting Arms
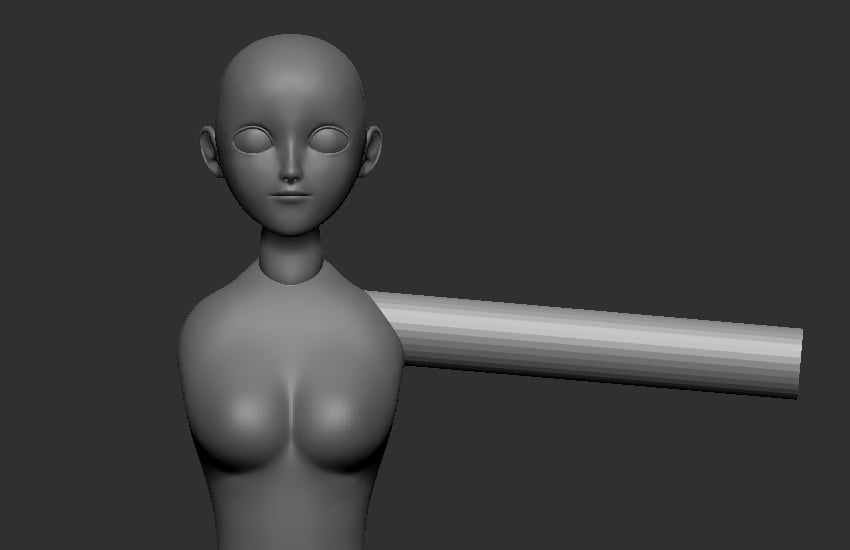
Step 1
Createa cylinder for arm. Place and scale the cylinder to the arm’s position as shown in the following image.


Step 2
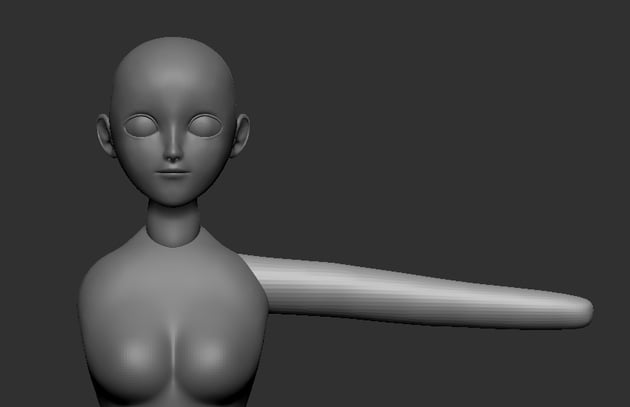
Press Dynamesh with Resolution as 32 to equalise the topology surface.


Step 3
HoldShift button to smooth the surface.


Step 4
Subdividethe mesh by pressing Ctrl-D for easier shaping. Use Move brush (B-M-V) toshape the arm.


Step 5
Press Shift-D to lower down the subdivision level. Then delete the higher level.


Step 6
Duplicateand mirror to the opposite side, then merge them together.


4. Merging Torso with Legs and Arms
Step 1
First Saveas your file for backup since merging is not an undo-able action. Merge thetorso, legs and arms meshes together.


Step 2
Go to Geometry and click on DynaMesh with resolution as 80 to fix the topology, then hold Shiftbutton to smooth the surface.


Step 3
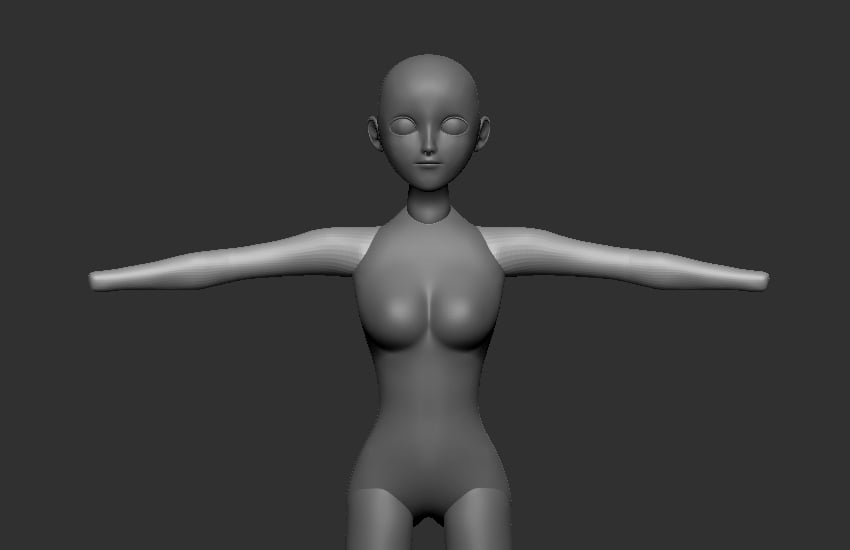
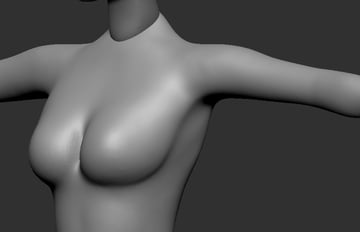
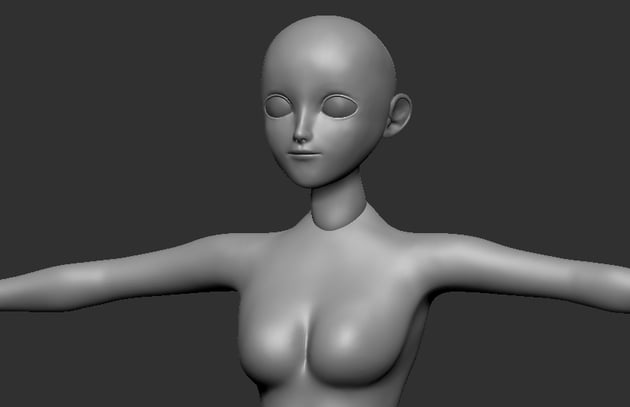
UseClayBuildUp brush (B-C-B) to shape the underarms and breasts details, thensmooth the surface.


Step 4
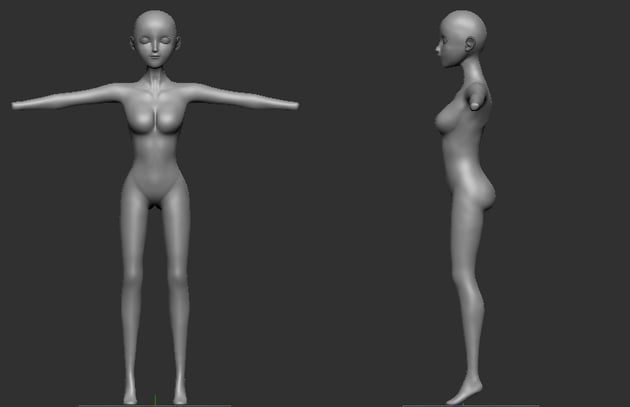
Continuewith B-C-B, sculpt out the rib cage shape and abdomen as shown in the following image.


Step 5
Use DamStandardbrush (B-D-S) to sculpt the line between the abdomen and thigh.


Step 6
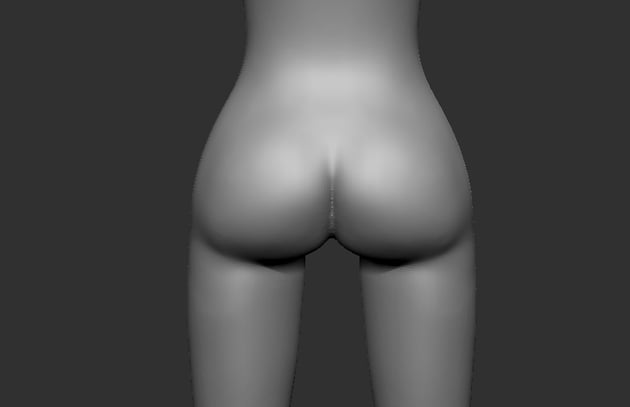
Use Move brush (B-M-V) to sculpt the hips and thigh.


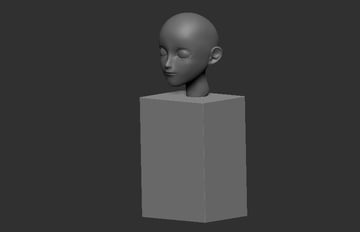
Step 7
Mergehead and body meshes together. This time, I wouldn’t use DynaMesh tocombine the topology, since DynaMesh will reduce the details that L'd madebefore.
The head mesh has a lot of small details like eyes, mouth, so we will onlymerge head and body without combining their topology.


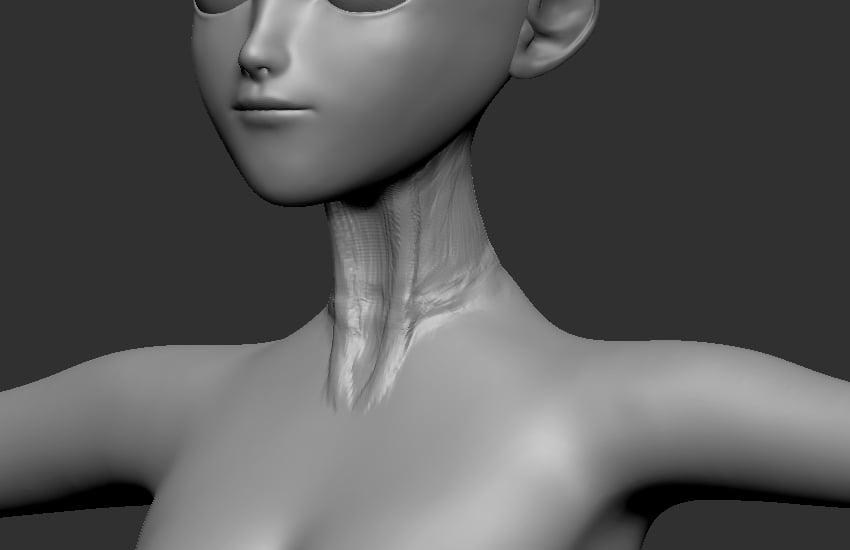
Step 8
UseClayBuildUp brush (B-C-B) to sculpt the throat.


Step 9
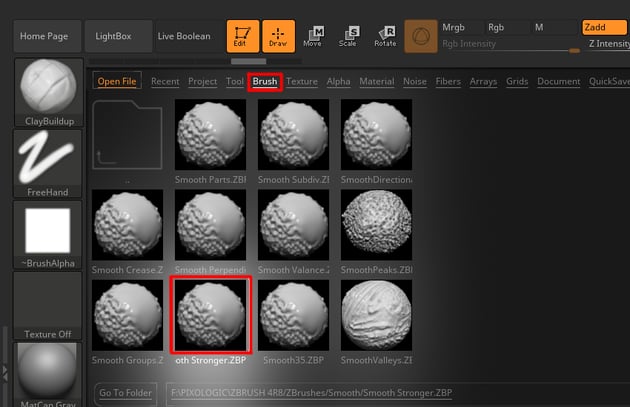
Since the head mesh was very high poly, so basic Smooth brush is not enough to smooth thesurface.
Press Comma key on the keyboard for Lightbox, then select brush from the Bar > Smooth folder and double click on Smooth Stronger.


Step 10
HoldShift button to smooth the surface. Use Polish brush (B-P-O) to polish theattaching line of neck and torso.


Step 11
UsingClayBuildUp brush (B-C-B), sculpt out the clavicle.


Step 12
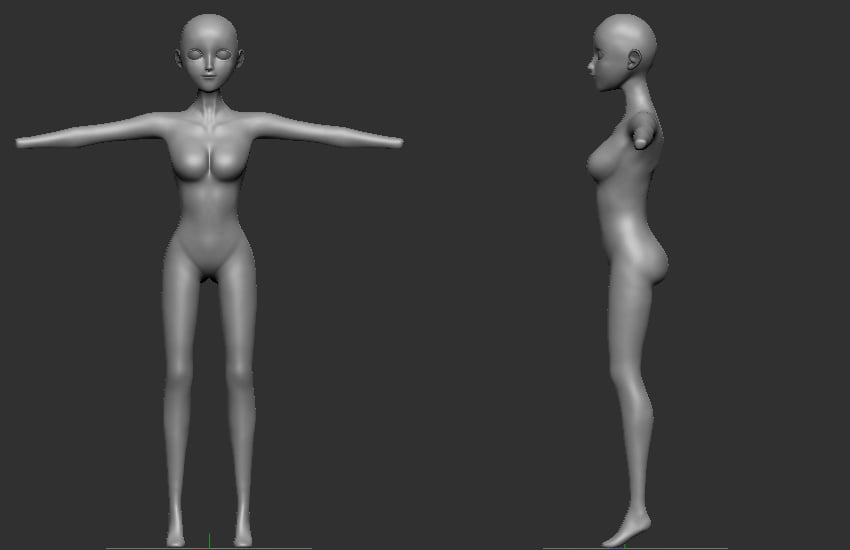
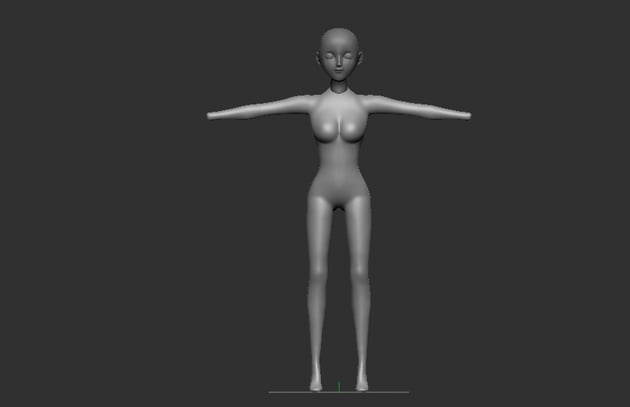
Now,we're done with sculpting the torso and limbs.


 By
By


